

With an agent
Let a coding agent install the CLI and create your first Devbox.
With the CLI
Install the CLI, create a Devbox, and start an agent in a session.
With the Dashboard
Create a Devbox in the browser, with nothing to install.
Get Started with an Agent
The quickest way to get started is to let a coding agent do it for you.Install the agent skill
Install the Namespace devboxes skill for your coding agent.The skill gives the agent a repeatable workflow for creating Devboxes, loading source code, running commands, and cleaning up after the task.
- Global
- Project
Installs the skill for every project on this machine:
Create a Devbox with the agent
Ask your agent to create a Devbox:
Agent Prompt
If the Devbox CLI is not installed, the agent installs it and runs
devbox login. Complete the login in your browser when prompted.Get Started with the CLI
Follow these steps to install the CLI and create a Devbox from your terminal. macOS
macOS Linux
Linux Windows
Authenticate with Namespace
Create a Devbox
devbox create provisions a Devbox and activates it, so it is ready to connect to when the command returns. Supply its configuration interactively or as flags.- Interactive
- Non-interactive
The CLI prompts for a name, an image, and a machine size:
--checkout clones a repository into the Devbox and requires a connected GitHub organization. Omitting it applies the workspace default repository, and --no_checkout skips the checkout entirely.See devbox create for the full set of options, including Blueprints, ephemeral Devboxes, and specification files.Connect to your Devbox
Connect to a session on the Devbox. A session keeps running when you close your terminal or disconnect, so work you start in it carries on without you.The CLI lists your Devboxes and their sessions, with an option to start a new session.
Connecting to a stopped Devbox starts it first, and your files persist across stop and start cycles.
Get Started with the Dashboard
The Dashboard needs no local installation. Follow these steps to create your first Devbox in the browser and open a shell in it.Connect a code provider
Open Devboxes in the Namespace Dashboard and connect a code provider so Namespace can clone your repositories. Devboxes can check out from GitHub and Cursor Origin.If you have not connected a provider yet, choose one from the Devboxes page: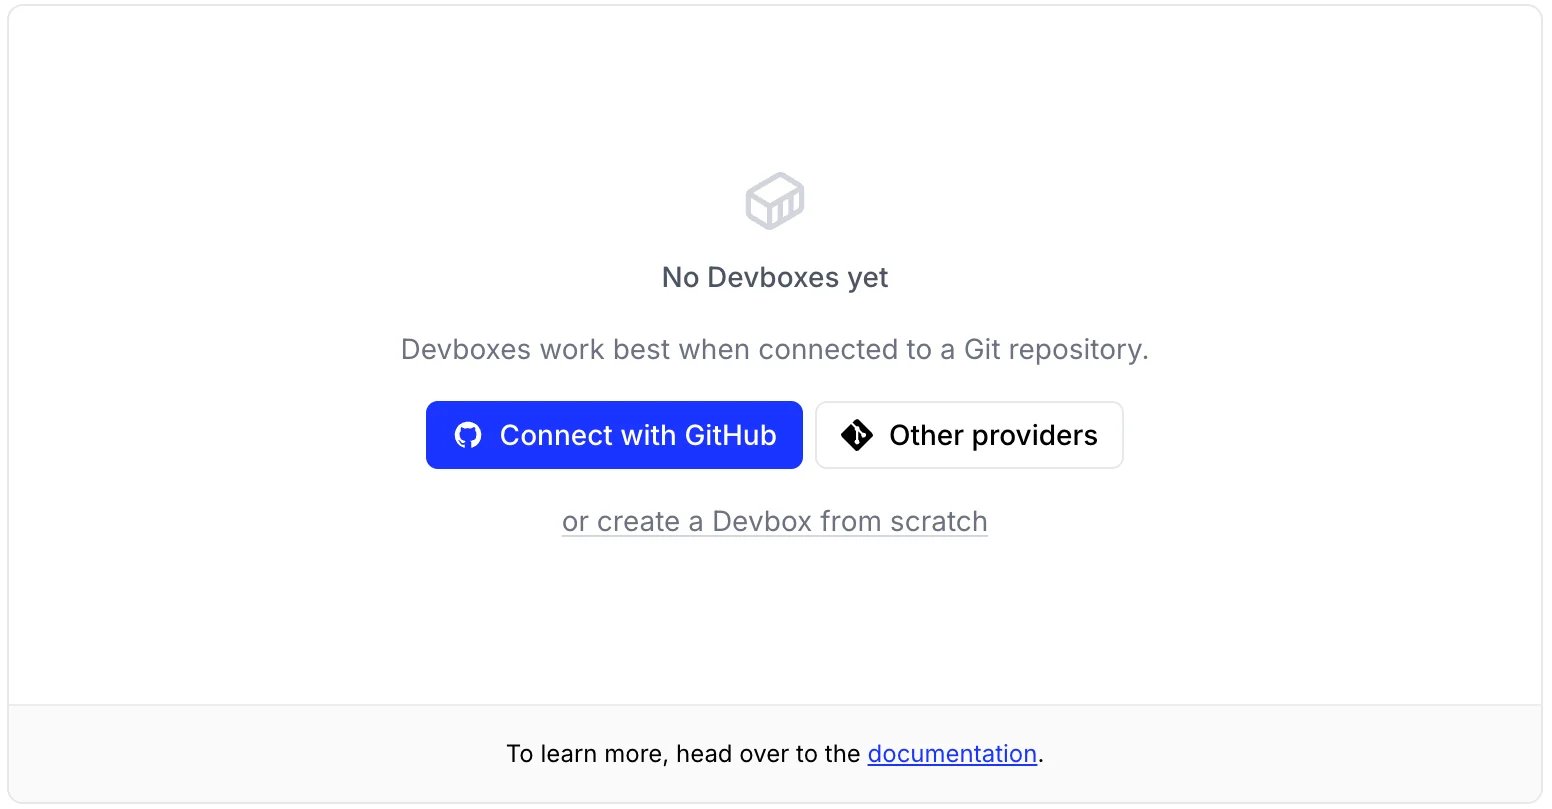
- For GitHub, press Connect with GitHub and follow the instructions to install the Namespace GitHub app.
- For Cursor Origin, press Other providers, then select Cursor Origin on the Code Providers page.
Connecting a provider lets Namespace clone your repositories into a Devbox, which is how you work on your own code. To look around first, select create a Devbox from scratch and connect a provider later.
Create a Devbox
Press + Create on the Devboxes page.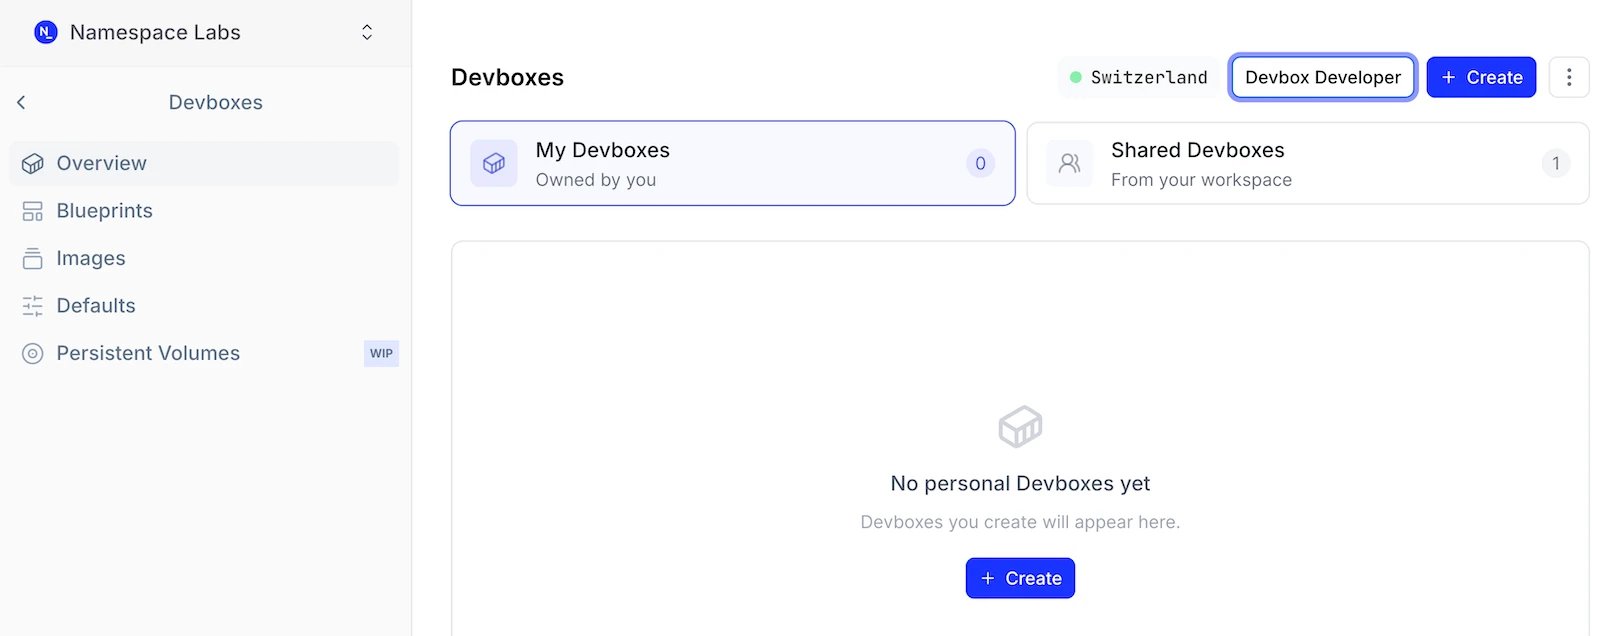
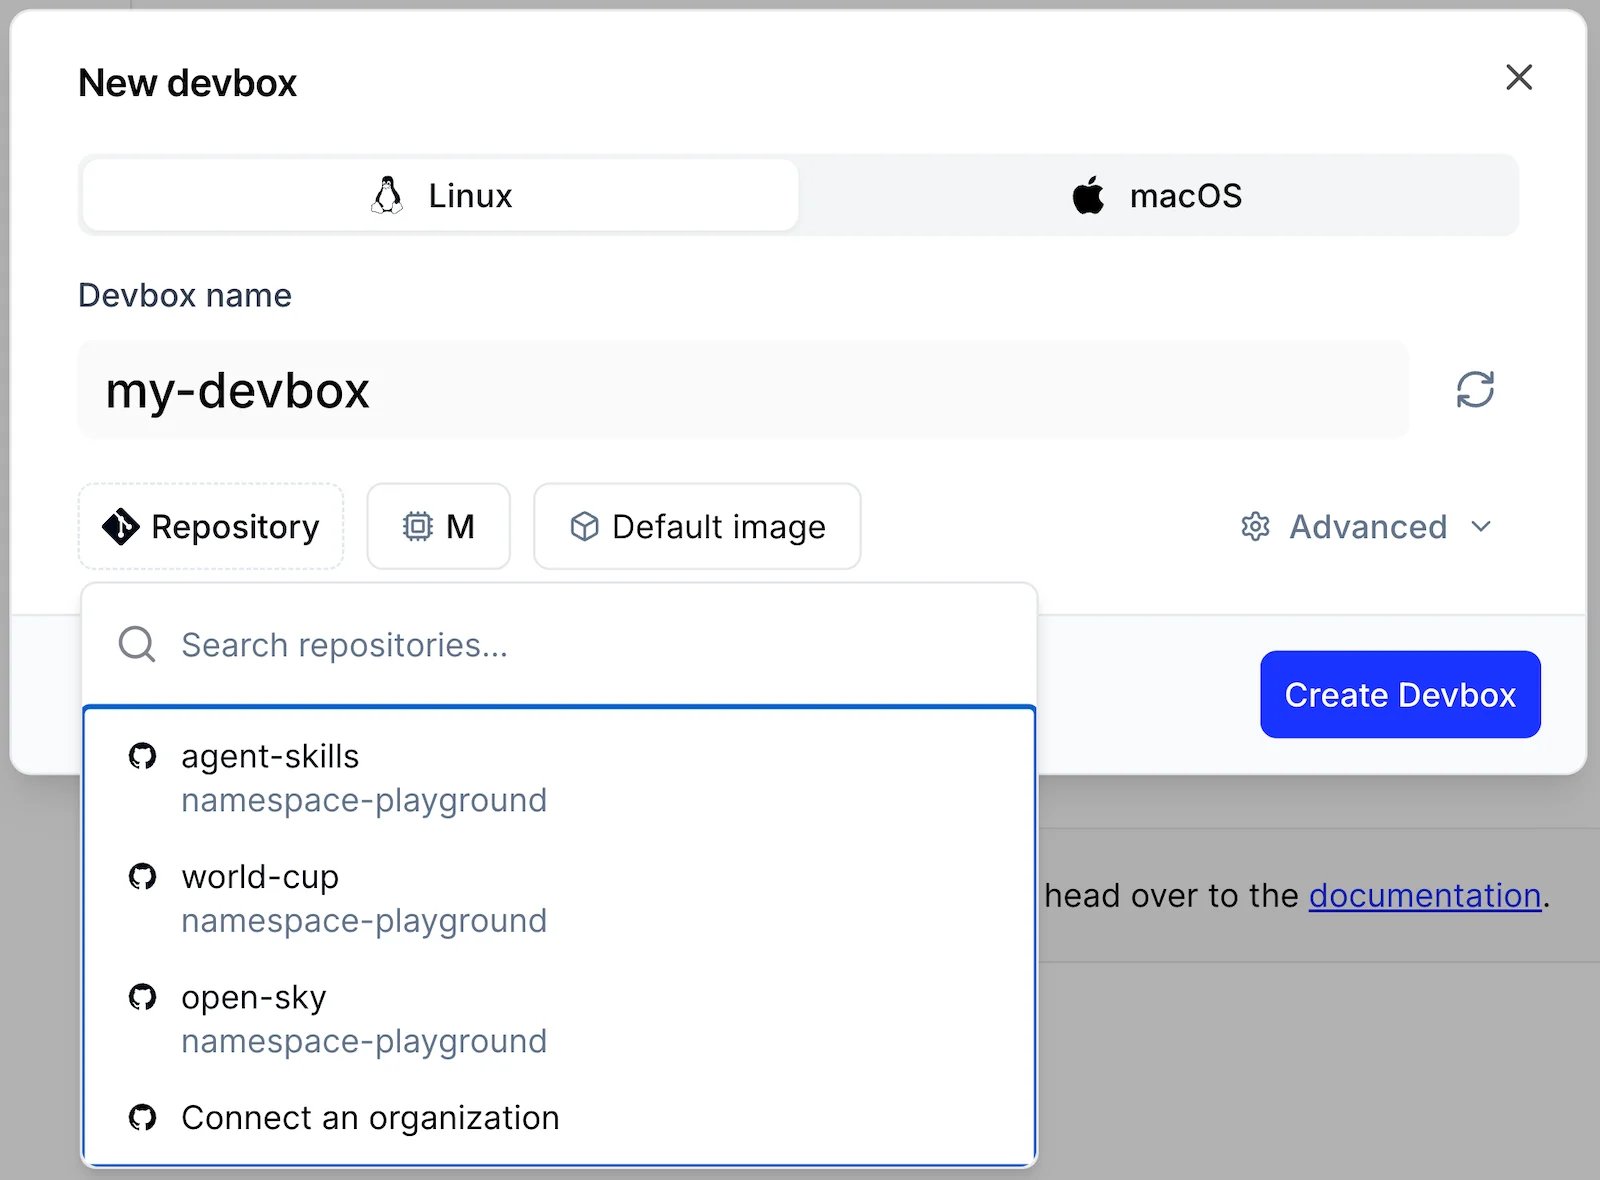
The list shows the repositories Namespace can reach through the GitHub app. If the one you want is missing, or you skipped the previous step, use the Connect an organization entry at the end of the list.
Connect and develop
The Devbox page shows its state and its initialization log while it starts.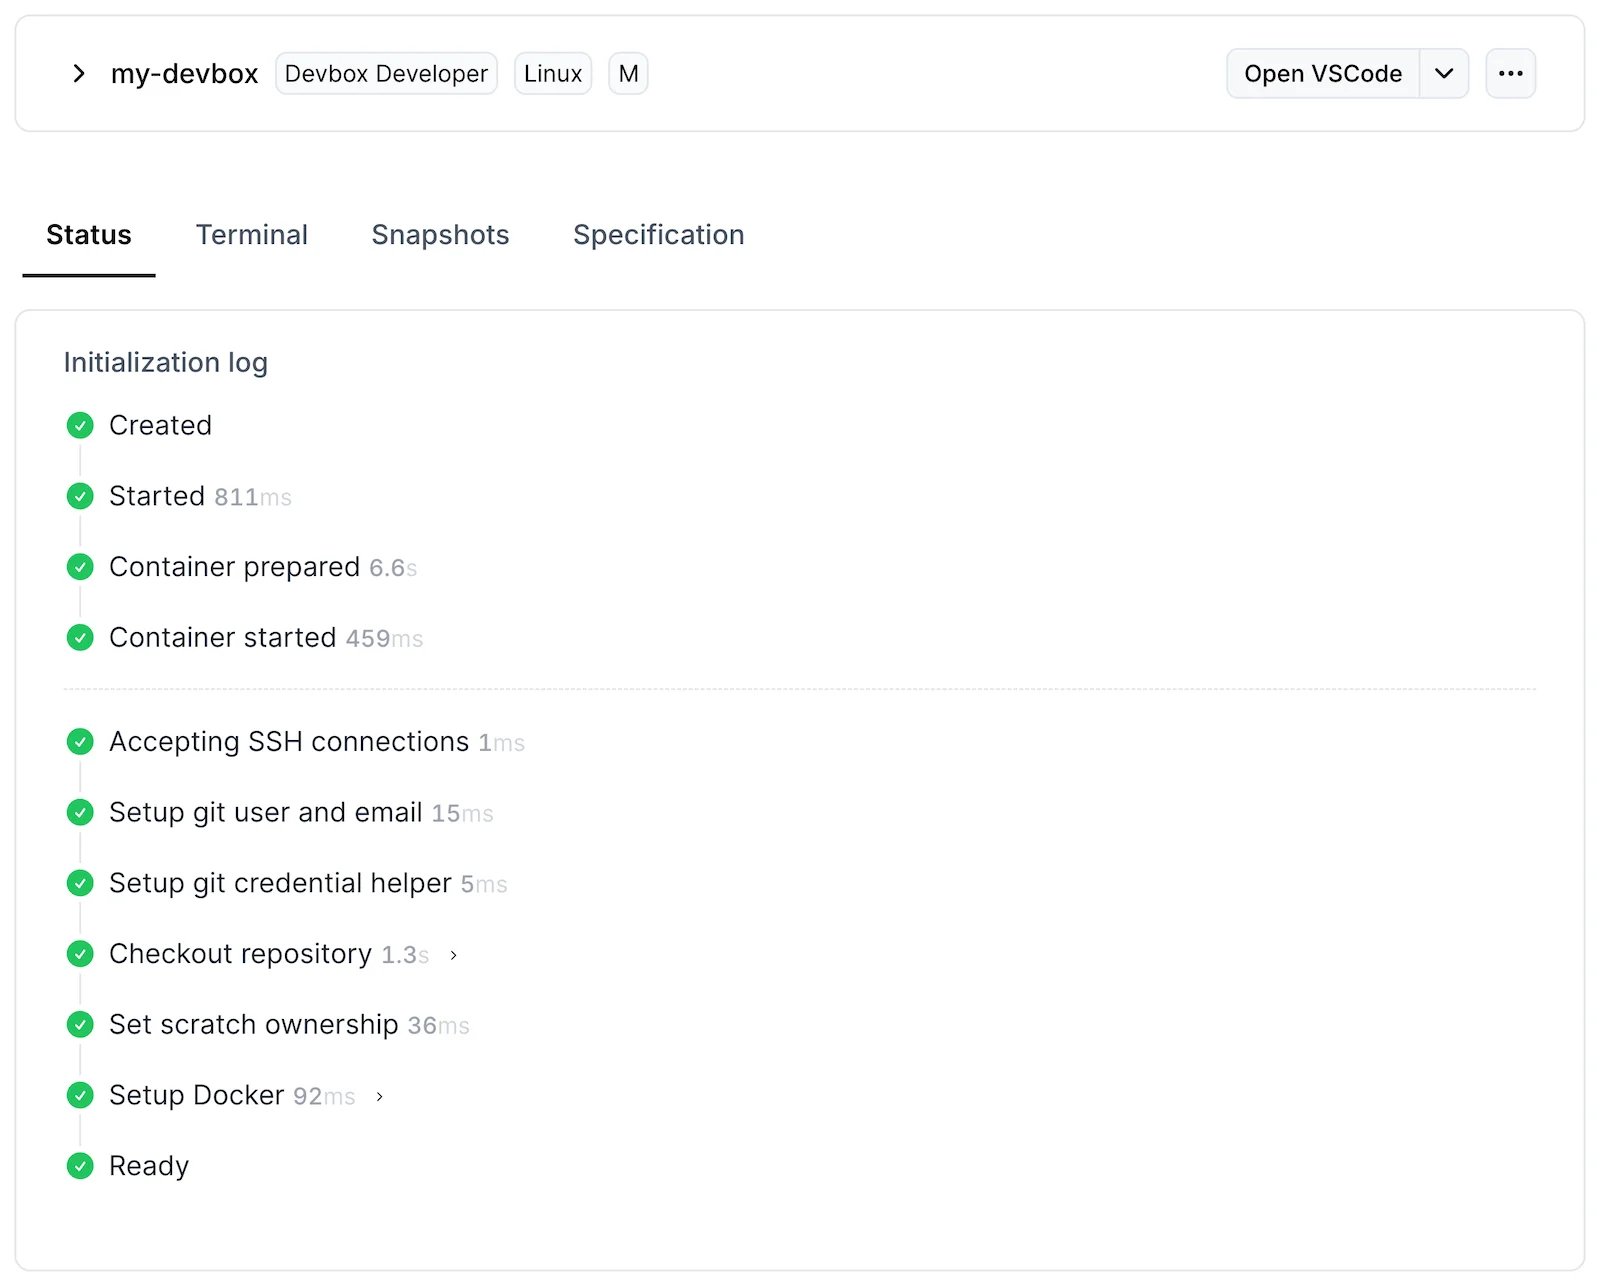
ls to see the cloned files:Open VS Code
Use the Open VSCode dropdown to open the Devbox in VS Code, Cursor, or VS Code for the Web. See IDEs for the full list of supported editors, including JetBrains and Zed.
Next Steps
Devbox Lifecycle
Create, list, stop, and delete Devboxes.
SSH & Sessions
Open a shell on a Devbox with SSH or a session.
IDEs
Open a Devbox in VS Code, Cursor, JetBrains, or Zed.