Choosing a caching solution
You have three options to cache your workflow data with Namespace. Pick based on how much workflow change you can tolerate and how predictable you need cache hits to be:GitHub Actions Cache
Works out of the box with no workflow changes. Best when you want a drop-in solution and the default behavior is good enough.
Namespace Cache Volumes
Fully local NVMe storage with high IOPS and no upload/download time. Best for the fastest cache hits; expect occasional misses on early runs. Requires small workflow changes.
Namespace Artifacts
Consistent cache hits from the first run, with explicit control over content and lifecycle. Best for expensive build outputs shared across jobs. Requires workflow changes.
Using a cache volume
Cache Volumes attach to a runner and expose a persistent directory that survives across runs. Unlike traditional caching solutions that require time-consuming uploads and downloads, Cache Volumes provide instant access to cached data through guaranteed cache locality. Cache Volumes support very high concurrency through automatic forking and scale up to hundreds of GB to match your project needs.Enable caching on your Runner Profile
Open the desired Runner Profile and enable caching. The minimum cache size is 20 GB.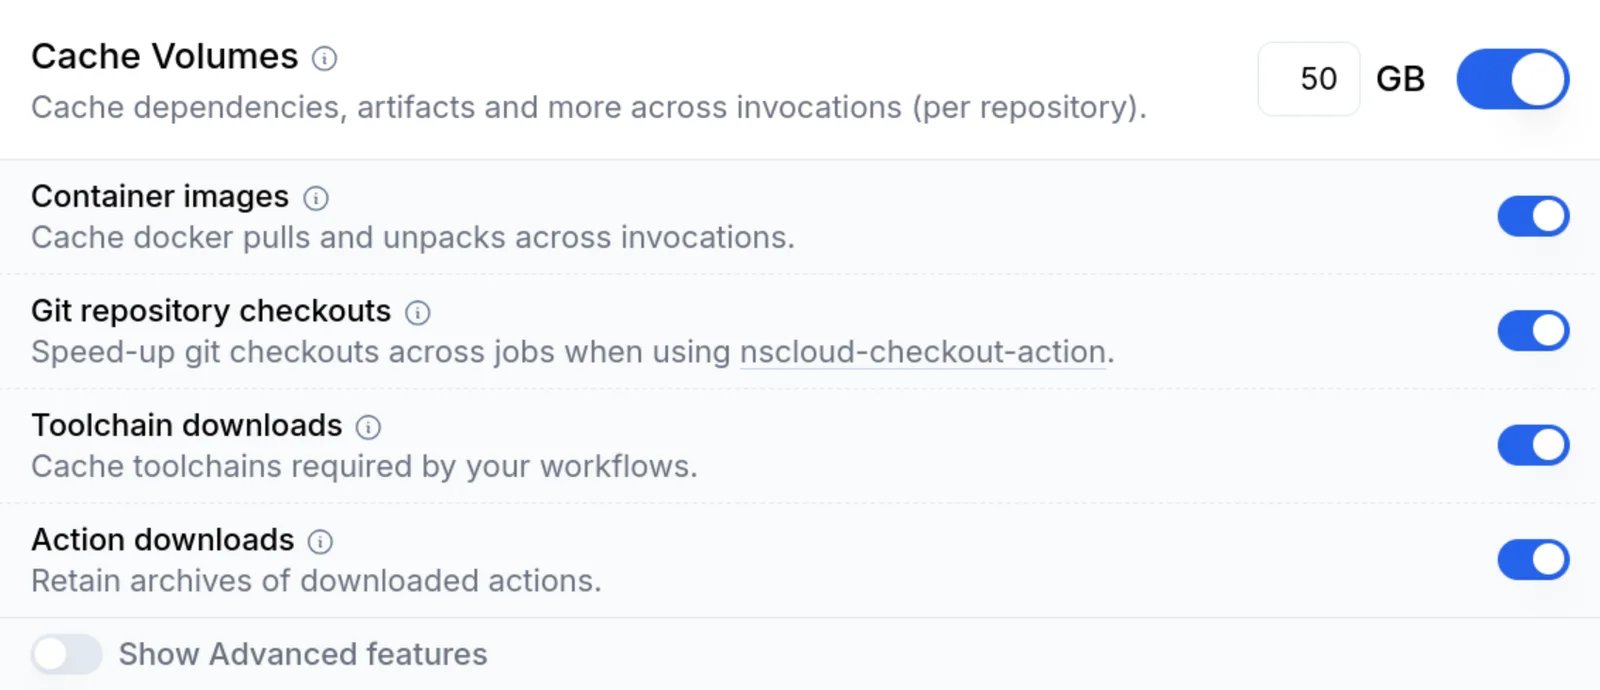
Use the cache in your workflow
The simplest way to start using the cache is to adopt
nscloud-cache-action.
The action supports many popular frameworks natively, but can also be used to cache arbitrary files or directories.-
Add the action to your workflow and select which framework you use. You can enable caching for multiple frameworks simultaneously:
For a full list of supported frameworks, check out the action reference.
-
In case native support is not available yet, you can still make your framework work with Cache Volumes. Simply configure a list of paths to retain:
Our support team can help you identify the optimal cache configuration.
What you can cache
The caching features below all use Cache Volumes.Container Images
Cache container image layers and the often expensive unpacking step, so repeated pulls complete in seconds. See Container Images.Git Checkouts
Cache a mirror of your git repository to speed up checkouts of large repositories, submodules, and Git LFS objects. See Git Checkouts.Toolchain Downloads
Cache downloads from setup actions likeactions/setup-go, actions/setup-python, and actions/setup-node.
See Toolchains.
Action Downloads
Cache the action archives your job downloads at startup, and usenscloud-cache-action as an actions/cache replacement.
See Actions.
Build System Integrations
Native caching presets for Bazel, Turborepo, Pants, Moonrepo, Gradle, and sccache. See Build System Integrations.Advanced cache volume management
Namespace cache volumes are separated at multiple levels to ensure security and prevent data leakage between different contexts.Isolation levels
Workspace isolation: Each workspace maintains completely separate cache volumes. Caches from one workspace cannot be accessed by any other workspace, providing a strong security boundary between different organizational units or projects. Runner Profiles: Different runner profiles use distinct cache volumes, even within the same workspace. This ensures that builds running on different profiles don’t interfere with each other’s cached data by default. Sharing the cache between two profiles is possible. Repository: Each repository using a specific runner profile gets its own separate cache volume. The cache volume will be shared between all jobs running for a Git repository, but remains distinct from other repositories, even when they share the same runner profile configuration. Sharing the cache between two repositories is possible. For scenarios requiring more control over the cache isolation boundary, custom cache tags can be specified.Sharing a cache volume
By default, Namespace isolates cache volumes. Each runner profile gets its own cache volume, and within a profile each repository gets its own too. Use a custom cache tag to have several jobs, profiles, or repositories reuse one cache. Every job that resolves to the same tag within a workspace attaches to the same cache volume. Append;overrides.cache-tag={tag} to the profile name. Two different profiles that set the same
tag share one cache volume:
namespace-profile-builds and namespace-profile-e2e-tests are separate profiles with their own
machine shapes and features, but both jobs read and write the same my-shared-cache volume. This
also works across repositories: any repository whose jobs set overrides.cache-tag=my-shared-cache
joins the same cache.
Every job sharing the tag can also update the cache contents. To let some of them read the cache
without persisting their changes, see Protect caches from updates.
Custom cache identity
For scenarios requiring full control over the cache isolation boundary, you can specify custom cache tags. To specify a custom cache tag when using a profile, append;overrides.cache-tag=new-tag-value to the profile name:
Protect caches from updates
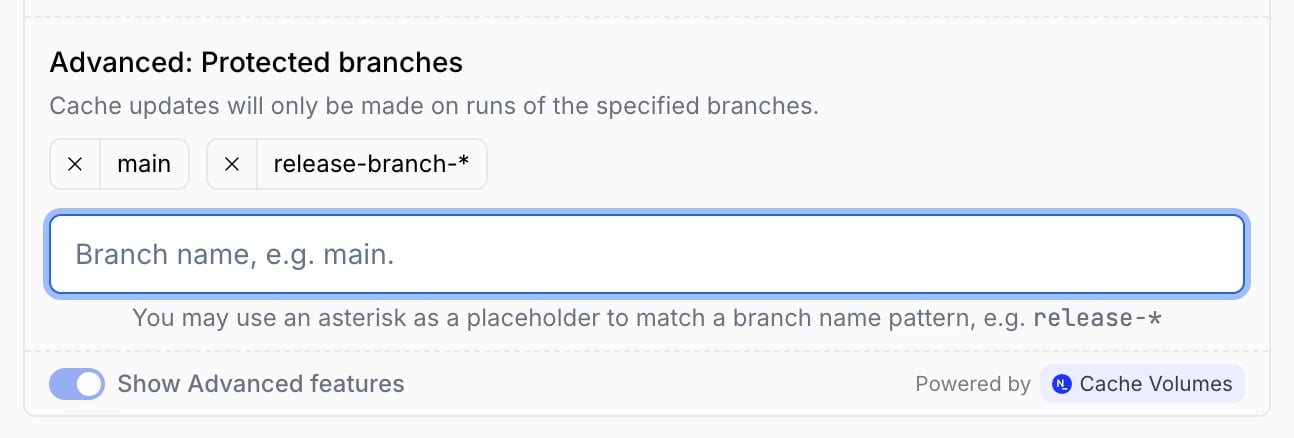
You can configure Cache Volumes to limit what git branches can perform updates to them. Restricting the source of cache updates is useful to avoid cache poisoning. When using this feature, all branches (including pull requests) can benefit from your cache, but only selected branches (e.g.main) may commit changes to it.
To specify which branches can update the cache volume, open the cache volume configuration, then
check Show Advanced features, and finally type the branch names.