Running GitHub Self-Hosted Runners Reliably


GitHub Actions are a fantastic CI/CD solution loved by many developers. They are intuitive to use, and their flexibility covers many use cases.
At Namespace Labs, we are huge fans of GitHub Actions, and we’ve been managing self-hosted runners for us and our customers for quite some time now. We decided to share our experience and tips to make the self-hosted runners’ infrastructure more reliable.
Why even bother with Self-Hosted Runners?
Since you are here, you probably already know the pros and cons of self-hosting GitHub runners and are interested in running your own. If not, we’ve discussed self-hosted runners in more detail in a previous blog post; go and check it out!
All in all, self-hosted runners allow for finer OS, hardware, and environment customization. This high flexibility comes at a maintenance cost. You are responsible for managing and securing the compute infrastructure that powers your self-hosted runners. You need to upgrade the OS when required and install all packages and tools your workflow jobs use.
On the bright side, self-hosted runners are free for public and private repositories.
Running Persistent Self-Host Runners
Persistent runners are the opposite of ephemeral runners. The latter process one workflow job and then terminate themselves. Persistent runners still process one job at a time but remain active after processing the job finishes.
The most straightforward deployment for self-hosted runners is to run an always-on persistent runner in one of your machines.
Download the runner package
The runner package is released for architecture amd64 and arm64, and macOS, Linux, and Windows OS. You can identify the correct package on the release page.
Download the package archive after selecting the desired runner OS, arch, and version variables. For example, with the below, I am downloading the runner image for macOS Apple silicon.
mkdir actions-runner && cd actions-runnerRUNNER_OS="osx" RUNNER_ARCH="arm64" RUNNER_VERSION="2.307.1"curl -fLo runner.tar.gz https://github.com/actions/runner/releases/download/v${RUNNER_VERSION}/actions-runner-${RUNNER_OS}-${RUNNER_ARCH}-${RUNNER_VERSION}.tar.gztar xzf ./runner.tar.gzGenerate a registration token
The self-hosted runner needs a token to authenticate itself to GitHub. You can generate a token to register the runner to a specific repository or organization. We will register our runner to a single repository with the related registration token API. But you can follow the same steps using the organization token API.
Note the following steps require the GitHub gh CLI.
OWNER="gmichelo" REPOSITORY="commerce"gh api \ --method POST \ -H "Accept: application/vnd.github+json" \ -H "X-GitHub-Api-Version: 2022-11-28" \ /repos/${OWNER}/${REPOSITORY}/actions/runners/registration-token { "token": "AAAXXX", "expires_at": "2023-08-03T15:55:21.860+02:00" }Configure and start the runner
You are ready to configure and start the runner.
The config.sh script has many options to configure the runner environment.
Most importantly, you want to set the runners labels, which
are the only properties GitHub uses to schedule workflow jobs onto runners.
When scheduling a job, GitHub selects a runner that matches all workflow labels.
See official GitHub docs for more details.
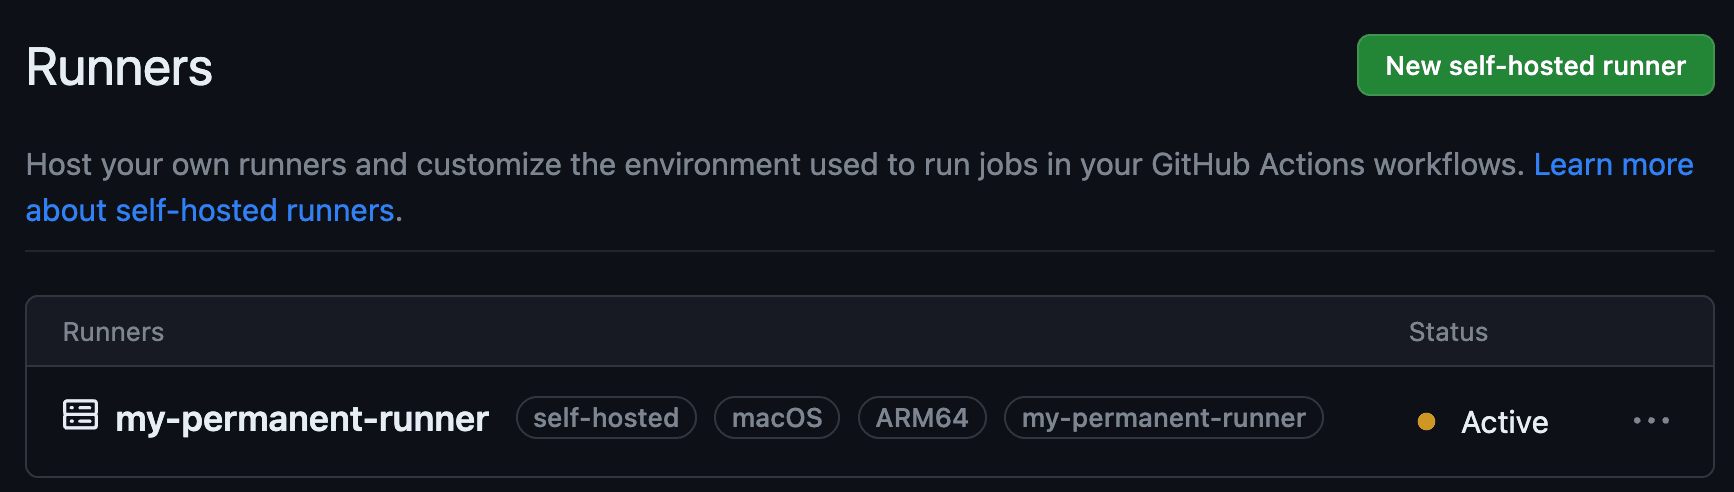
In the following example, I've decided to label my runner my-permanent-runner.
./config.sh --url https://github.com/${OWNER}/${REPOSITORY} \ --token AAAXXX \ --name my-permanent-runner \ --labels my-permanent-runner \ --unattended # Authentication √ Connected to GitHub # Runner Registration √ Runner successfully added √ Runner connection is good # Runner settings √ Settings Saved.Finally, run it!
./run.sh √ Connected to GitHub Current runner version: '2.307.1' 2023-08-03 13:05:34Z: Listening for JobsConfirm runner is registered on GitHub
The runner is active and waiting for jobs from GitHub. You can confirm that it was successfully registered to GitHub from the UI or API.
gh api \ -H "Accept: application/vnd.github+json" \ -H "X-GitHub-Api-Version: 2022-11-28" \ /repos/${OWNER}/${REPOSITORY}/actions/runners { "total_count": 1, "runners": [ { "id": 22, "name": "my-permanent-runner", "os": "macOS", "status": "online", "busy": false, "labels": [ { "id": 1, "name": "self-hosted", "type": "read-only" }, { "id": 2, "name": "macOS", "type": "read-only" }, { "id": 3, "name": "ARM64", "type": "read-only" }, { "id": 4, "name": "my-permanent-runner", "type": "custom" } ] } ] }The API shows that the runner status is online and that it is not processing any job (i.e. busy equals false).
Use the self-hosted runner in a workflow
Modify your workflow file to match the runs-on field to the runner’s
label. GitHub will schedule jobs to the runner having every
label you specify in that field.
jobs:build_with_self_hosted:name: Build with self-hosted runner- runs-on: ubuntu-latest+ runs-on: my-permanent-runnersteps:
Once the job is submitted, GitHub will schedule it on our self-hosted runner. When our runner receives the job, it prints the job information to standard output.
√ Connected to GitHubCurrent runner version: '2.307.1'2023-08-03 13:05:34Z: Listening for Jobs2023-08-03 13:11:21Z: Running job: Build with self-hosted runner2023-08-03 13:13:27Z: Job Build with self-hosted runner completed with result: SucceededAnd the runner status transitions to active.
So, we made it. We've just run GitHub Actions on our self-hosted runner! Registering runners by hand is a good approach for initial experimentation and testing the environment configuration. But it won't scale. Manually managing many runners will soon become cumbersome, and starting a single runner application per machine leads to poor resource utilization.
The recommended deployment uses auto-scaling, ephemeral runners, and scale-to-0.
Auto-scaling Runners with Kubernetes
If you use Kubernetes, then GitHub got you covered. They developed a Kubernetes operator to dynamically scale up and down runners based on the number of queued jobs.
Note the following steps require kubectl, helm 3, and, most importantly, a Kubernetes cluster.
Installing ARC
NAMESPACE="arc-runners"helm install arc \ --namespace "${NAMESPACE}" \ --create-namespace \ oci://ghcr.io/actions/actions-runner-controller-charts/gha-runner-scale-set-controllerYou can confirm ARC is installed by checking CRDs and pods.
kubectl get crd autoscalinglisteners.actions.github.com 2023-08-03T15:10:05Z autoscalingrunnersets.actions.github.com 2023-08-03T15:10:05Z ephemeralrunners.actions.github.com 2023-08-03T15:10:05Z ephemeralrunnersets.actions.github.com 2023-08-03T15:10:05Zkubectl get pods -n arc-runners NAME READY STATUS RESTARTS AGE arc-gha-runner-scale-set-controller-755f574df6-z6c48 1/1 Running 0 118sGenerate a Personal Access Token
ARC authenticates against GitHub using personal access tokens. If you want to create self-hosted runners for specific
repositories, you need to create a PAT with repo scope. If you want to
register organization runners instead, you need a PAT with admin:org scope.
Follow the official GitHub docs to create a PAT. Remember to save the token value somewhere safe and then come back here.
Create a Runner Scale Set
Now, we create a AutoscalingRunnerSets resource with the name arc-runner-set. This name will also be the
runner’s label in your workflow file’s runs-on field.
Set the personal access token you created at the step before in variable GITHUB_PAT.
INSTALLATION_NAME="arc-runner-set"GITHUB_CONFIG_URL="https://github.com/${OWNER}/${REPOSITORY}"GITHUB_PAT="<PAT>"helm install "${INSTALLATION_NAME}" \ --namespace "${NAMESPACE}" \ --create-namespace \ --set githubConfigUrl="${GITHUB_CONFIG_URL}" \ --set githubConfigSecret.github_token="${GITHUB_PAT}" \ oci://ghcr.io/actions/actions-runner-controller-charts/gha-runner-scale-setWith helm list, we can confirm that the CRD resource is deployed with Helm.
helm list -A NAME NAMESPACE REVISION UPDATED STATUS CHART APP VERSION arc arc-runners 1 2023-08-03 17:10:06.376484 +0200 CEST deployed gha-runner-scale-set-controller-0.4.0 0.4.0 arc-runner-set arc-runners 1 2023-08-03 17:26:06.035833 +0200 CEST deployed gha-runner-scale-set-0.4.0 0.4.0Use the ARC runners in a workflow
As before, we need to change the workflow file and set the INSTALLATION_NAME value we used above (e.g. arc-runner-set).
jobs:build_with_arc:name: Build with ARC runner- runs-on: ubuntu-latest+ runs-on: arc-runner-setsteps:
ARC can create ephemeral runners on the fly, as new job requests come from GitHub.
In my example, I started three jobs, and ARC auto-scaled three pods to serve them in parallel. You can check the pods with kubectl.
kubectl get pods -n arc-runners NAME READY STATUS RESTARTS AGE arc-gha-runner-scale-set-controller-755f574df6-z6c48 1/1 Running 0 26m arc-runner-set-754b578d-listener 1/1 Running 0 10m arc-runner-set-sn5hq-runner-bxzh4 1/1 Running 0 5s arc-runner-set-sn5hq-runner-j75br 1/1 Running 0 5s arc-runner-set-sn5hq-runner-nhwfw 1/1 Running 0 5sOnce the jobs finish, the ephemeral runners terminate, and the pods are deleted. This automatic release of unused resources is a significant improvement from before when we had a single always-on runner application installed in our machine, capable of serving only one job at a time.
Namespace Runners
Does the above look like a lot of work? Yes, it is a lot of work. We went through similar steps to deploy our self-hosted runners, and it took a lot of engineering to get it right.
In an upcoming blog post, we will share the design of our self-hosted runner offering and how we made it possible to scale to thousands of ephemeral runner VMs in a matter of seconds. We'll discuss the challenges of managing ephemeral capacity and designing a robust scheduler resilient to outages, and how to react when GitHub misbehaves.
Are you looking for the advantages of self-hosted runners but want to avoid handling the associated complexity (managing a Kubernetes cluster and writing your own GitHub runners scheduler)? Then Namespace Runners are the perfect fit.
After three simple installation steps, you can access powerful AMD64 or ARM64 runners with up to 32 CPU and 64 GB of RAM. Our runners have access to an integrated environment with cache volumes, optimized builder machines for faster Docker builds, a private Docker registry for your team, and preview environments to run QA tests.
