> ## Documentation Index
> Fetch the complete documentation index at: https://namespace.so/docs/llms.txt
> Use this file to discover all available pages before exploring further.
# Namespace MCP server
> Connect AI agents such as Claude Code, Codex, Cursor, and VS Code to Namespace with the hosted MCP server.
The Namespace MCP server lets AI agents investigate builds and GitHub Actions jobs, analyze compute and CI usage, and manage Devboxes.
## Connect your agent
Add the server to your agent, then log in.
Add the server for all your projects:
```bash Read and write theme={null}
claude mcp add --transport http --scope user namespace https://mcp.namespace.so/mcp
```
```bash Read only theme={null}
claude mcp add --transport http --scope user namespace https://mcp.namespace.so/mcp/readonly
```
Log in by running `/mcp` in a Claude Code session, selecting `namespace`, and choosing **Authenticate**. You can also log in from the terminal:
```bash theme={null}
claude mcp login namespace
```
To check the connection, run `claude mcp list`.
Add the server:
```bash Read and write theme={null}
codex mcp add namespace --url https://mcp.namespace.so/mcp
```
```bash Read only theme={null}
codex mcp add namespace --url https://mcp.namespace.so/mcp/readonly
```
Or add it to `~/.codex/config.toml`:
```toml ~/.codex/config.toml theme={null}
[mcp_servers.namespace]
url = "https://mcp.namespace.so/mcp"
```
If Codex doesn't open the login when you add the server, log in with:
```bash theme={null}
codex mcp login namespace
```
To check the connection, run `codex mcp list`.
Install the server with one click:
| Access | Install |
| - | - |
| Read and write | 
 |
| Read only | |
After you add the server, Cursor opens **Customize** > **MCPs**. Select **Authenticate** on the Namespace tile to log in.
Install the server with one click:
| Access | Install |
| - | - |
| Read and write |
|
| Read only | |
After you add the server, Cursor opens **Customize** > **MCPs**. Select **Authenticate** on the Namespace tile to log in.
Install the server with one click:
| Access | Install |
| - | - |
| Read and write | 
 |
| Read only | |
After you add the server, VS Code asks you to authenticate. Select **Allow** to log in.
To check the connection, run **MCP: List Servers** from the Command Palette.
Add the server:
```bash Read and write theme={null}
amp mcp add namespace https://mcp.namespace.so/mcp
```
```bash Read only theme={null}
amp mcp add namespace https://mcp.namespace.so/mcp/readonly
```
Amp opens the login in your browser the next time you start it.
To check the connection, run `amp mcp list`.
Add the server for all your projects:
```bash Read and write theme={null}
gemini mcp add --transport http --scope user namespace https://mcp.namespace.so/mcp
```
```bash Read only theme={null}
gemini mcp add --transport http --scope user namespace https://mcp.namespace.so/mcp/readonly
```
Gemini CLI opens the login in your browser when it first connects. To log in again, run `/mcp auth namespace` in a session.
To check the connection, run `gemini mcp list`.
## Choose access
| Endpoint | Access | Use it to |
| - | - | - |
| `https://mcp.namespace.so/mcp` | Read and write | Let the agent do everything available with read-only access, plus create, start, stop, and delete Devboxes and run commands in them. |
| `https://mcp.namespace.so/mcp/readonly` | Read only | Let the agent investigate GitHub Actions jobs and builds, analyze compute resource usage, and check the Namespace service status without changing anything. |
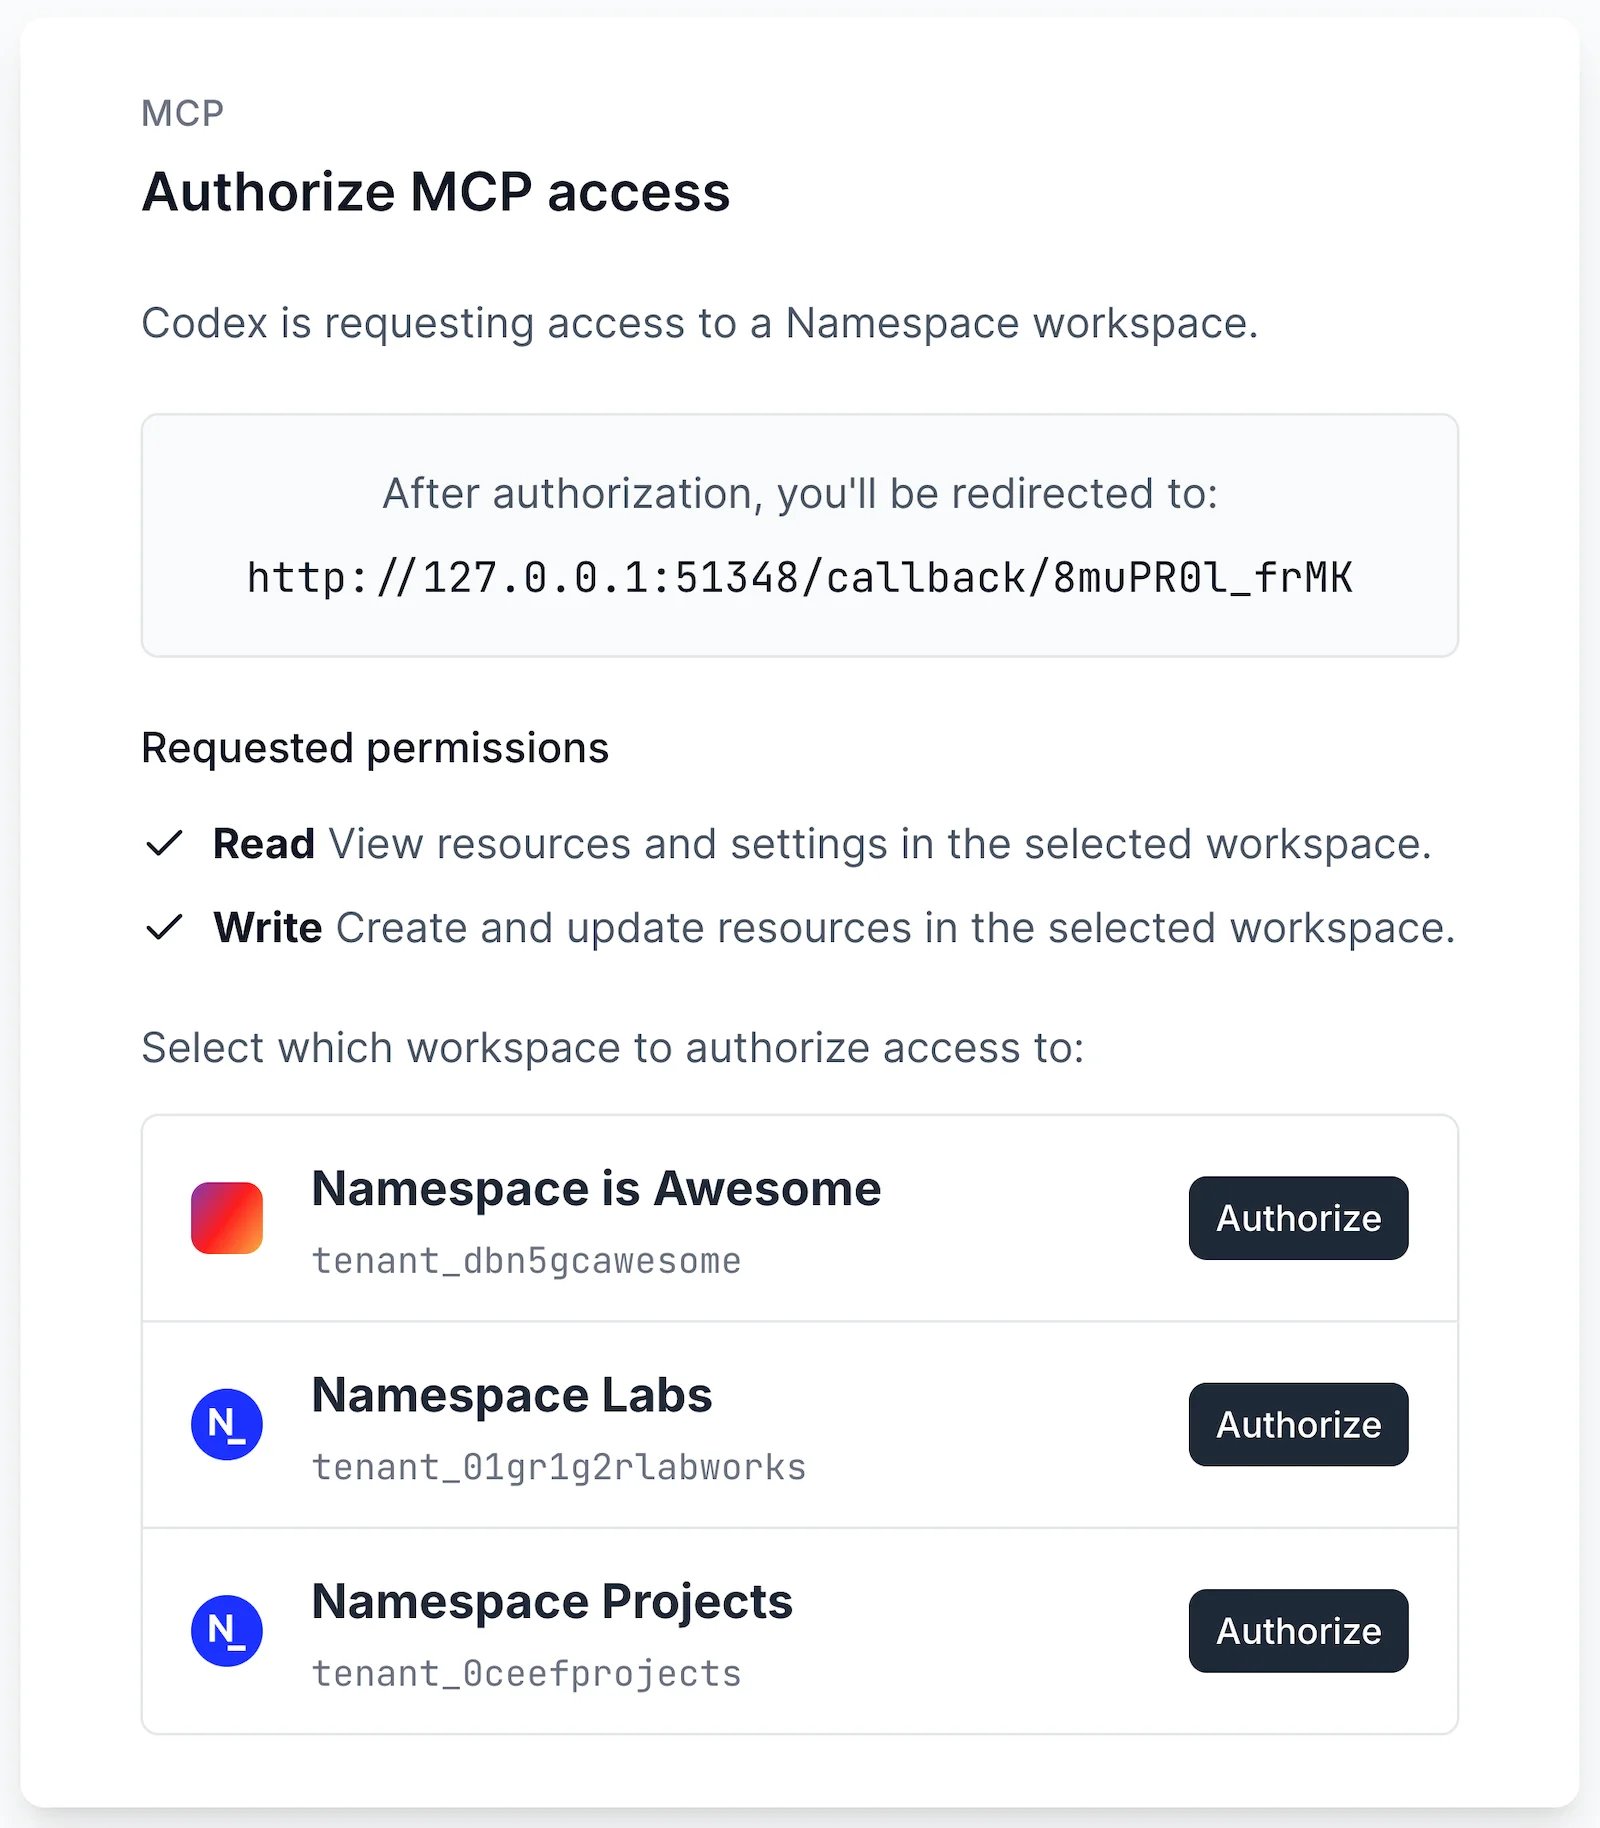
The first time your agent connects, it opens Namespace in your browser. Review the requested permissions, then authorize the workspace it can access.
|
| Read only | |
After you add the server, VS Code asks you to authenticate. Select **Allow** to log in.
To check the connection, run **MCP: List Servers** from the Command Palette.
Add the server:
```bash Read and write theme={null}
amp mcp add namespace https://mcp.namespace.so/mcp
```
```bash Read only theme={null}
amp mcp add namespace https://mcp.namespace.so/mcp/readonly
```
Amp opens the login in your browser the next time you start it.
To check the connection, run `amp mcp list`.
Add the server for all your projects:
```bash Read and write theme={null}
gemini mcp add --transport http --scope user namespace https://mcp.namespace.so/mcp
```
```bash Read only theme={null}
gemini mcp add --transport http --scope user namespace https://mcp.namespace.so/mcp/readonly
```
Gemini CLI opens the login in your browser when it first connects. To log in again, run `/mcp auth namespace` in a session.
To check the connection, run `gemini mcp list`.
## Choose access
| Endpoint | Access | Use it to |
| - | - | - |
| `https://mcp.namespace.so/mcp` | Read and write | Let the agent do everything available with read-only access, plus create, start, stop, and delete Devboxes and run commands in them. |
| `https://mcp.namespace.so/mcp/readonly` | Read only | Let the agent investigate GitHub Actions jobs and builds, analyze compute resource usage, and check the Namespace service status without changing anything. |
The first time your agent connects, it opens Namespace in your browser. Review the requested permissions, then authorize the workspace it can access.
 Read-only access only limits the Namespace MCP server. An agent with shell access can still use `nsc` or `devbox` with your local credentials.
## Common use cases
| Use case | Example prompt |
| - | - |
| Investigate jobs | "Why did Namespace GitHub Actions job `` fail?" |
| Analyze CI usage | "Which GitHub Actions jobs ran most often on Namespace this week?" |
| Right-size runners | "Which GitHub Actions jobs running on Namespace can move to smaller runners?" |
| Investigate builds | "Why did Namespace container image build `` fail?" |
| Instance observability | "Why did Namespace instance `` fail? Chart its resource usage." |
| Devboxes | "Create a Namespace Devbox, make a Hello World HTML page, serve it, and expose it at a private `devbox.so` URL." |
## Use MCP with local tools
For the most efficient workflows, install `nsc`, `devbox`, and the GitHub CLI alongside the Namespace MCP server. MCP connects the agent to your Namespace resources. When a task needs capabilities it doesn't provide, it may guide the agent to the appropriate CLI.
| Tool | Best for |
| - | - |
| Namespace MCP | Finding and connecting workspace resources, CI usage, and compute metrics. |
| [`nsc`](/docs/reference/cli/installation) | Complete, live, or cross-instance logs and other Namespace CLI workflows. |
| [`devbox`](/docs/reference/devbox-cli/installation) | Uploading local files and working directly with Devboxes. |
| [GitHub CLI](https://cli.github.com/) | Pull request and commit context, and complete or live GitHub Actions logs. |
## Manage access
Each connection is authorized for one workspace. To use another workspace, add the server under a different name and authorize it separately. Sessions renew automatically.
To review or revoke access, open [Applications](https://cloud.namespace.so/workspace/settings/applications) in the Namespace dashboard. Revoked agents must log in again.
## Troubleshooting
| Problem | Resolution |
| - | - |
| The agent needs authentication | Start the login from your agent using the instructions under [Connect your agent](#connect-your-agent). |
| Write tools are missing | Connect to `https://mcp.namespace.so/mcp` instead of the read-only endpoint, then log in again. |
| Authentication failed | The approval may have been revoked. Log in again from your agent. |
| Permission denied | Check that you authorized the correct workspace and that your Namespace role can access the resource. |
This documentation is built and hosted on [Mintlify](https://mintlify.com), a developer documentation platform.
Read-only access only limits the Namespace MCP server. An agent with shell access can still use `nsc` or `devbox` with your local credentials.
## Common use cases
| Use case | Example prompt |
| - | - |
| Investigate jobs | "Why did Namespace GitHub Actions job `` fail?" |
| Analyze CI usage | "Which GitHub Actions jobs ran most often on Namespace this week?" |
| Right-size runners | "Which GitHub Actions jobs running on Namespace can move to smaller runners?" |
| Investigate builds | "Why did Namespace container image build `` fail?" |
| Instance observability | "Why did Namespace instance `` fail? Chart its resource usage." |
| Devboxes | "Create a Namespace Devbox, make a Hello World HTML page, serve it, and expose it at a private `devbox.so` URL." |
## Use MCP with local tools
For the most efficient workflows, install `nsc`, `devbox`, and the GitHub CLI alongside the Namespace MCP server. MCP connects the agent to your Namespace resources. When a task needs capabilities it doesn't provide, it may guide the agent to the appropriate CLI.
| Tool | Best for |
| - | - |
| Namespace MCP | Finding and connecting workspace resources, CI usage, and compute metrics. |
| [`nsc`](/docs/reference/cli/installation) | Complete, live, or cross-instance logs and other Namespace CLI workflows. |
| [`devbox`](/docs/reference/devbox-cli/installation) | Uploading local files and working directly with Devboxes. |
| [GitHub CLI](https://cli.github.com/) | Pull request and commit context, and complete or live GitHub Actions logs. |
## Manage access
Each connection is authorized for one workspace. To use another workspace, add the server under a different name and authorize it separately. Sessions renew automatically.
To review or revoke access, open [Applications](https://cloud.namespace.so/workspace/settings/applications) in the Namespace dashboard. Revoked agents must log in again.
## Troubleshooting
| Problem | Resolution |
| - | - |
| The agent needs authentication | Start the login from your agent using the instructions under [Connect your agent](#connect-your-agent). |
| Write tools are missing | Connect to `https://mcp.namespace.so/mcp` instead of the read-only endpoint, then log in again. |
| Authentication failed | The approval may have been revoked. Log in again from your agent. |
| Permission denied | Check that you authorized the correct workspace and that your Namespace role can access the resource. |
This documentation is built and hosted on [Mintlify](https://mintlify.com), a developer documentation platform.